During our introduction to CEP811 we were asked to look at four different kits and pick one. I decided to pick the Squishy Circuits because its price point was one that I am sure my school could afford. Moreover, electrical circuits are part of the grade 9 science curriculum here in Alberta, so I felt if nothing else I could transfer my knowledge of Squishy Circuits over to my science colleagues. The second part of the challenge came in the form of needed to find a second-hand item to repurpose using the Squishy Circuit kit. We explored the idea that much of what is used in education is repurposed from other uses, using a video of a presentation done by Mishra and Koehler(2008) about the interrelation of Pedagogy, Content, Technology and Context that they refer to as the TPACK or the Total PACKage. In this blog I have tried to highlight how I combined the technology of Squishy Circuits with the content of mathematics and the pedagogy of immediate feedback and diagnostic learning to create an activity to use in the context of my class.
The first thing I did was go to the Squishy circuit site, link is above, and watched the videos about using the squishy circuits. I spent time to watch them all to ensure I had a firm grasp on what the makers of Squishy Circuits had originally envisioned for their product. I then moved on to making the playdough.
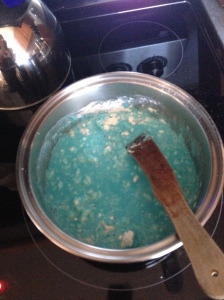 Making the playdough was easy enough. The recipes were in the box of Squishy Circuits but they are also available on their website. I had all the ingredients in my kitchen so that was a bonus. I make the conductive dough first. It required it to be made on the stove using medium heat. The instructions say to stir continually but I stopped to snap this pic and it turned out just fine.Then it asks you to knead in the extra flour into the dough. CAUTION contents are hotter than you would expect. This is not an activity for children as the dough is very warm to the touch. I will admit I let it cool for 2 or 3 minutes before proceeding but every once and awhile I would hit a spot that was still warm.Then I moved on to the insulating dough. This dough does not require heat so it can be made by children. Note, this dough smells and tastes great so you will probably need extra of this dough if your students as of the type that would eat their project materials. The dough called for one and a half cups of flour but this was not enough for the humidity here. At one and a half cups a flour all I had was a sticky mess. I added almost another cup of flour to the dough to make it useable. Keep that in mind when you are making your dough so you don’t just have the one and a half cups of flour on hand.
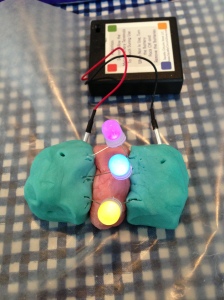
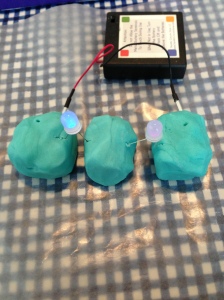
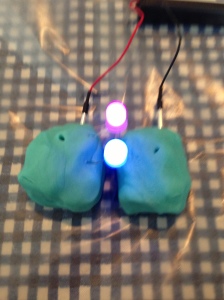
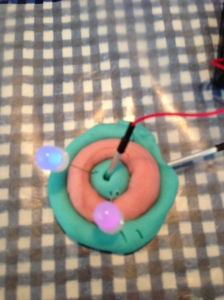
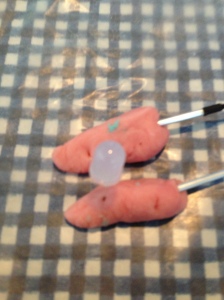
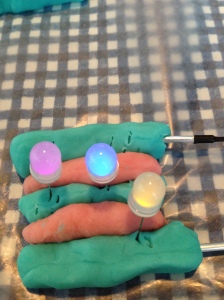
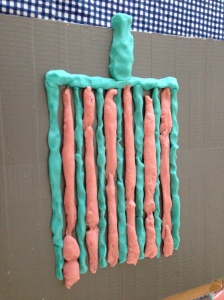
Then I started to play with the dough, LEDs, and the batter pack. I tried to recreate all the activities I had seen in the videos. Below are some examples of what I did.
The last thing I did when I was playing was design the following item. I used this for inspiration for my final project but more on that later. Watch this video to see what I came up with while playing with the squishy circuits.
After playing, I started looking for more ways people had used squishy circuits. I found some good sites with ways to teach all about electricity.There are a few sites I’d like to highlight. The first is Learn 2 Teach, Teach 2 Learn for their game to build a squishy circuit in a monopoly kind of way. The second website I would like to highlight is Sean M Elliott’s Theoretikos. On this page in his blog he runs through his lesson plan for teaching about electricity with squishy circuits. The third site I would like to highlight is Bay Area Scientists in Schools Presentation Plan by Chuck Cusumano. The fourth and last site I would like to highlight is How to make a Rube Goldberg Machine with a Squishy Circuit an activity often done by the grade 8 students at my school in science. I also found many websites where the students created animals or other creations with the dough and pieces. However, I did not find any math activities, not to say that they are not out there but my search yielded none.
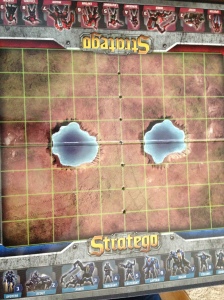
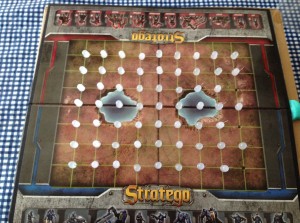
 I have set my focus in my master’s courses to try to always link back what I am doing to my classroom. So I thought and thought about how I could use my squishy circuits in my math classroom. I decided that because the squishy circuits are so fun to play with they would lend themselves best to a game, but which one was another challenge. Enter the next part of this week’s challenge, thrifting. We had to figure out how to repurpose a second-hand item to create our project. So off to our local Value Village for a look at what I could find. I was thinking about Batttleship when I went, but luck was not on my side as no Battleship game was there. so that left me looking through the rack to find my item. Way in the back behind other items I found the game Stratego, still in its package.
The rest of this blog will be a how to create your very own version of my Cartesian Plane Squishy Circuits Board. Here in Alberta, Finding points on all four quadrants of the cartesian plane is a skill for grade 7, however I know the grade level of this skill changes depending on where you live.
Step 1
Find a game board that has straight lines running horizontally and vertically. I found Stratego but I am sure a checker board would work equally as well.
Step 2
Cover the back of the board in duct tape as the moisture from the playdough will seep into the game board otherwise. Another great repurposing for duct tape.
Step 3
Find a box the same size as your game board so that the LEDs’ wires can hang straight down. The box also helps keep the playdough where it belongs, more on that later.
Step 4
Using a hammer and a large nail, punch holes into the board at the intersection of the lines. You want the holes to also go through the cardboard box to allow for the electrode wire to remain straight to ensure it is in the conductive playdough.
Step 5
Flip the game board so that you can see the back. Lay out the conductive dough along the holes and link it up on one side. Put the insulating dough into the spaces between the conducting dough to prevent short circuits if the dough is squished together once the board is attached to the box.
Step 6
This step is the most difficult, so you may need an extra set of hands. You need to line up the game board onto the box so that the holes line up again. I put a toothpick through the holes on opposite corners to help with the lining up.
Step 7
Bend the negative lead from the LED up beside the LED and then put the positive lead through the hole.
Step 8
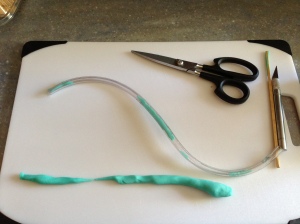
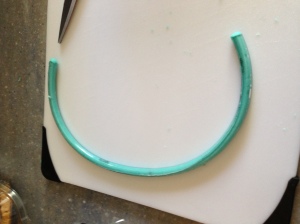
Take a piece of rubber tubing that reaches across your board in all directions. Cut the tubing down one side and stuff the tube with conducting dough. Ensure that the dough make a continues chain, to ensure the electricity has a path to travel. Then tape up the tube, make sure you can get back into the tube as the playdough will need to be changed when it dries out. Ensure to leave both ends of the tube open as you will need contact with the dough at both ends.
Step 9
Put the positive electrode from the battery pack into the conductive dough on the game board. Put the negative electrode into one end of the dough filled tube.
Step 10
Create cards that ask students what colour the LED is at a particular set of coordinates
Step 11
Turn the battery pack on and start playing. Below is a video where I quickly demonstrate my game. I would encourage you to get your game board before you order you LEDs as I ended up with 3 fewer LEDs than I needed.
I am excited to use this game in my class. I started to arrange the LEDs in such a way that I could tell if the students was mixing up their x or y coordinates but I soon realized that I did not have enough of the appropriate colours to do so. I will need to order more LEDs in the appropriate colours in order to make the diagnostics of this activity quicker for me to complete. For example I would put a blue LED at the point (+1,+1) then I would put a green LED at (-1,-1) indicating the student is having difficulties moving in both x and y. I would have a purple LED at (+1, -1), this telling me the student is having trouble with moving using the y coordinate. I would have a yellow LED at (-1,+1) to let me know the student is having difficulty moving with the x coordinate. Carefully planning this in advance and having a cheat sheet of what the colours will mean diagnostically will mean quicker feedback for the students and more information for me about each student with which to plan further activities.
Koehler & Mishra (2008) Teaching Creatively: Teachers as Designers of Technology, Content and Pedagogy [Video file], Retrieved from Vimeo http://vimeo.com/39539571

[…] In last week’s blog I repurposed the game Stratego and my Squishy Circuit makers’ kit to create an activity centre that relates to the outcomes in the Grade 7 Mathematics Program of studies for the Province of Alberta. Specifically I am going to link this activity centre to Specific Outcome 4-Achievment Indicators 2 and 3; and Specific Outcome 5-Achievment Indicators 2, 3, and 4. […]
What a neat creation Amy. I too during the process was really struggling with something to implement in my math classroom, but this is really awesome. I like that you really thought about your students in the sense that when you are assessing them, you will be able to tell what misconceptions they are making as opposed to just knowing that they were wrong.
I thought it was really well described and in depth. I hope you had as much making it as I did learning about it.
[…] week’s challenge in CEP811 is to redesign the activity we designed in week 2 and then added to in week 3 , to ensure it is a force for equality and that everyone can count and […]
[…] decided to raid my parent’s basement in hopes of finding my old Stratego board. I found a blog form 2013 that used squishy circuits to make a coordinate plane with a Stratego […]